
Red team infrastructure - Adding key-based SSH access via Terraform
Learn how to generate SSH key pairs automatically via Terraform and attach them to EC2 instance to enable key-based SSH access.

In previous posts, we successfully laid the groundwork for red team infrastructure on AWS. We configured a custom VPC, created public and private subnets, set up internet access with an Internet Gateway and route tables, and launched a Kali Linux EC2 instance as an attacker box. So far, we’ve relied on password to access the EC2 instance via SSH. However, when it comes to securing red team infrastructure in real-world scenarios, especially during long-running operations, it's time to shift gears and adopt SSH key-based authentication.
Why key-based access is preferred?
Password-based authentication, while simple to set up, poses significant security risks. Passwords can be brute-forced, stolen, or reused across systems. In contrast, SSH key-based access is far more secure. It relies on a pair of cryptographic keys — a public key, which gets stored on the server, and a private key, which stays with the operator. Access is granted only when the private key correctly matches the public key, making it virtually impossible for unauthorized users to gain access without possessing the private key.
Follow my journey of 100 Days of Red Team on WhatsApp, Telegram or Discord.
From a red team perspective, key-based access minimizes detection opportunities and provides more reliable persistence mechanisms. Additionally, SSH keys eliminate the need to hardcode credentials or use environment variables for secrets — a win for operational security (OPSEC).
Before deploying our instance with key-based access, we need an SSH key pair. There are two ways to create this key pair: manually using tools like ssh-keygen, or automatically using Terraform.
Generating SSH key pairs (manually)
This method gives you full control over the key generation process, ensuring that the private key never leaves your local system.
The following command can be used to generate public/private key pair (you may need to change the path specified via -f):
ssh-keygen -t rsa -b 4096 -f ~/.ssh/redteam_kali -C "redteam@100days"This creates:
~/.ssh/redteam_kali(the private key) — keep this safe and never upload it.~/.ssh/redteam_kali.pub(the public key) — can be safely uploaded to AWS or shared.
To use this key within your Terraform project, add the aws_key_pair resource in main.tf. The aws_key_pair resource in Terraform is used to register an SSH public key with AWS. This key is then associated with EC2 instances so that users can log in securely using the corresponding private key.
resource "aws_key_pair" "manual_key" {
  key_name   = "100daysofredteam-key"
  public_key = file("~/.ssh/redteam_kali.pub")

  tags = {
    Name = "100daysofredteam-sshkey-${var.environment}"
  }
}
Next, add this key to the ec2_instance module:
module "ec2_kali" {
  source            = "./modules/ec2_instance"
  ami_id            = var.ami_id
  instance_type     = var.instance_type
  subnet_id         = module.network.public_subnet_id
  security_group_id = module.sg.kali_sg_id
  associate_public_ip = true
  key_name          = aws_key_pair.manual_key.key_name
  environment       = var.environment
}
You will also need to add the key_name variable definition to variables.tf within ec2_instance module:
variable "key_name" {
type = string
description = "The name of the SSH key pair to associate with the EC2 instance"
validation {
condition = length(var.key_name) > 0
error_message = "key_name must not be empty."
}
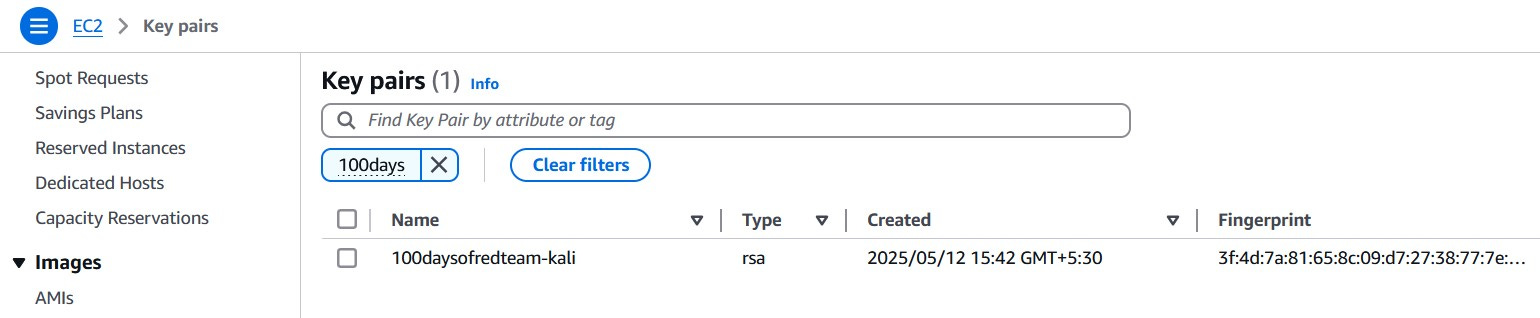
}Post this, when you run terraform apply, Terraform will automatically upload the public key to AWS and attach it to the EC2 instance. If this does not work, you can manually upload the public key via following steps:
Go to the AWS EC2 Console.
In the left menu, select Key Pairs under Network & Security.
Click Actions > Select Import Key Pair.
Provide a name (e.g.,
redteam-kali-key) and paste the contents ofredteam_kali.pub.Click Import key pair.
Generating SSH key pairs (via Terraform)
Terraform allows you to generate SSH key pairs dynamically using the tls_private_key resource. This is helpful for fully automated deployments — especially in short-lived or disposable environments — where key generation, instance creation, and destruction are handled in one pipeline.
Note: While convenient, be cautious — if local state is compromised, so is your private key.
Here’s how it works:
resource "tls_private_key" "ssh_key" {
  algorithm = "RSA"
  rsa_bits  = 4096
}
This key can be registered in the AWS EC2 console using the aws_key_pair resource:
resource "aws_key_pair" "generated_key" {
  key_name   = var.key_name
  public_key = tls_private_key.ssh_key.public_key_openssh

  tags = {
    Name = "100daysofredteam-sshkey-${var.environment}"
  }
}tls_private_keygenerates a new SSH key pair.public_key_opensshreturns the public key in a format accepted by AWS.The
aws_key_pairresource registers that public key in the AWS EC2 console under the specifiedkey_name.
To write the private key to disk, you might use the local_file resource — but again, be extremely careful. The local_file resource is a utility in Terraform that allows you to write text content to a file on the local machine running Terraform.
resource "local_file" "private_key" {
  content          = tls_private_key.this.private_key_pem
  filename         = "${path.module}/${var.key_name}.pem"
  file_permission  = "0600"
  count            = var.write_private_key ? 1 : 0
}
Note: The
tls_private_keyresource does not require OpenSSH or any external tools to be installed. Terraform handles key generation internally using Go libraries.
Deploying the EC2 instance with key-based access via SSH
Refer to the Kickstarting red team infrastructure automation via Terraform to understand the architecture we are working with.
We will use the following updated directory structure (note that we have added a new module, ssh_key):
red-team-infra/
├── main.tf
├── variables.tf
├── outputs.tf
├── terraform.tfvars
├── providers.tf
├── secrets.tfvars  # <--- manually created, not committed
└── modules/
    ├── vpc/
    │   ├── main.tf
    │   ├── variables.tf
    │   └── outputs.tf
    ├── subnet/
    │   ├── main.tf
    │   ├── variables.tf
    │   └── outputs.tf
    ├── internet_gateway/
    │   ├── main.tf
    │   ├── variables.tf
    │   └── outputs.tf
    ├── route_tables/
    │   ├── main.tf
    │   ├── variables.tf
    │   └── outputs.tf
    ├── ec2_instance/
    │   ├── main.tf
    │   ├── variables.tf
    │   └── outputs.tf
    ├── security_group/
    │   ├── main.tf
    │   ├── variables.tf
    │   └── outputs.tf
    └── ssh_key/
        ├── main.tf
        ├── variables.tf
└── outputs.tfReminder: You must create a
secrets.tfvarsfile manually to hold credentials. Never commit secrets to version control. It contains AWS credentials temporarily stored in plain text, which is not recommended for production environments. Also, we are still using local state files for simplicity. In a real red team deployment, you must use an encrypted remote backend.
Here is the Terraform Red Team Infrastructure project in 100 Days of Red Team GitHub repository that deploys a Kali Linux EC2 instance with key-based SSH access in AWS.
Clone this project to your machine and execute the following commands to deploy the infrastructure:
Following permissions need to be added to the
TerraformEC2AccessIAM policy before using the above mentioned project:
ec2:ImportKeyPair
ec2:DeleteKeyPair
⚠️Reminder: Switch to the dev Terraform workspace (terraform workspace select dev) before executing following commands. To create dev workspace use, terraform workspace new dev.
terraform init
terraform plan -var-file "secrets.tfvars"
terraform apply -var-file "secrets.tfvars"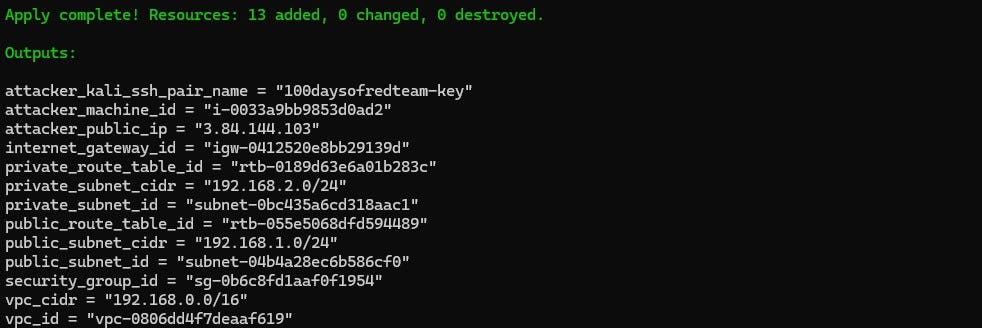
Once the Kali Linux EC2 instance has been created, you can connect it via following command:
ssh -l kali -i .\modules\ssh_key\100daysofredteam-kali.pem <Public IP of EC2 instance>
Once done, remember to destroy the infrastructure via following command (or you may incur significant costs):
terraform destroy -var-file "secrets.tfvars"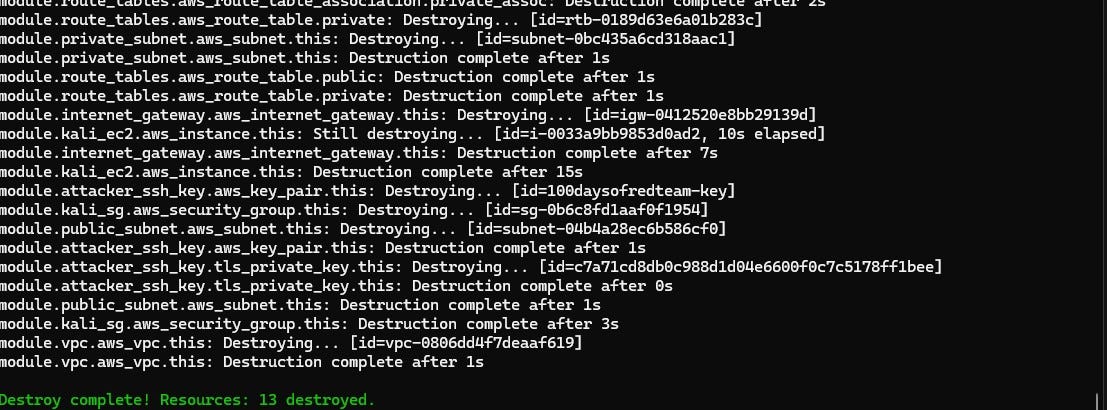
TL;DR
In this post we covered how to:
- Generate SSH key pair manually and register it in AWS via Terraform.
- Automatically generate SSH key pair and register it in AWS via Terraform.
- Attach the SSH key-pair to EC2 instance.
Follow my journey of 100 Days of Red Team on WhatsApp, Telegram or Discord.