
Red team infrastructure - EC2 Kali Linux deployment with Terraform
Learn how to deploy a Kali Linux EC2 instance via Terraform, restrict access to it and configure SSH access.

With a working VPC and subnets in place, the next step is deploying EC2 instances. The first machine we will launch is the attacker machine: a Kali Linux EC2 instance.
Choosing a Kali AMI
The first step in deploying a Kali EC2 instance is identifying the correct AMI (Amazon Machine Image). While there are many third-party vendors offering customized Kali images, Offensive Security also provides an official Kali Linux image. We will be using this AMI. To find the AMI ID, one can go to the EC2 launch wizard in the AWS Console, search for "Kali Linux", and copy the AMI ID that matches the region and desired architecture.
Follow my journey of 100 Days of Red Team on WhatsApp, Telegram or Discord.
Note: Because AMI IDs vary by region, we will pass the
ami_idas a variable in our Terraform configuration. This also gives us flexibility if we want to use custom images or switch between AMIs during testing.
EC2 instance configuration
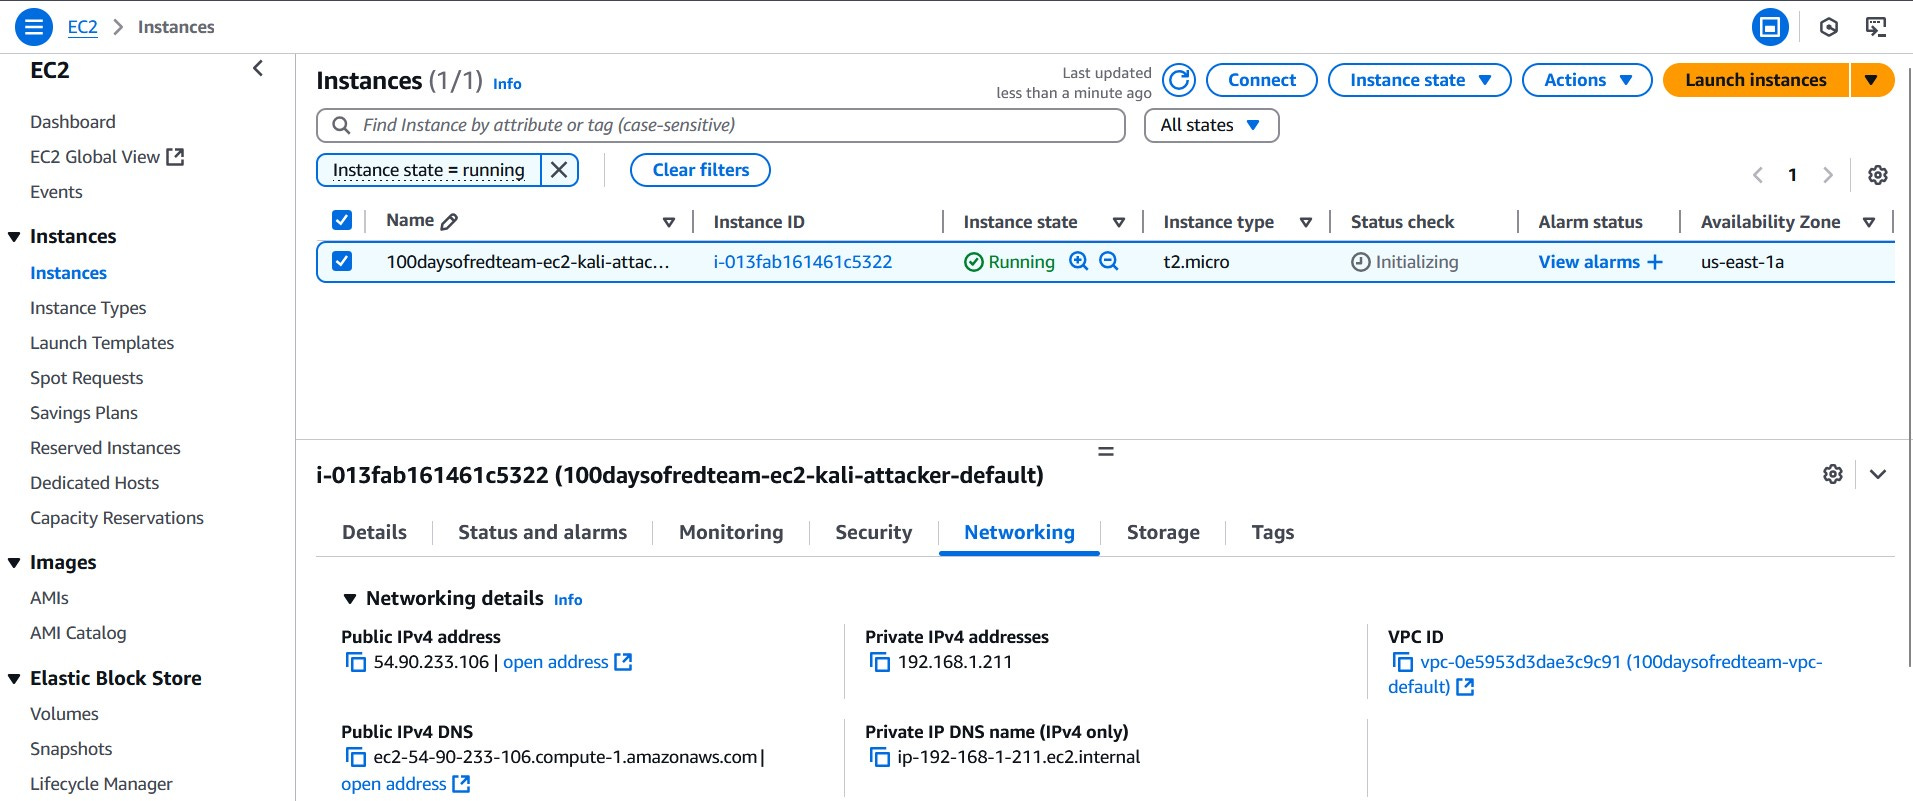
Once we have the AMI, the next step is to define the configuration for the EC2 instance. The attacker box needs to live in a public subnet so that it can be accessed externally. In previous posts, we created a public subnet, internet gateway, and associated route tables. We will now tie this EC2 instance into that existing infrastructure (as shown below).

We will provision a t2.micro instance, assign it to the public subnet, and associate it with a security group that allows SSH access from the user’s public IP address.
For the purpose of this post, we will configure the instance to accept username and password over SSH instead of the usual SSH key-based login (this will come later).
Note: Enabling password authentication is intended here for demo and learning purposes. In production or live red team operations, always prefer key-based authentication and tightly restrict SSH access.
To configure SSH password login, we will use a user_data argument that modifies the /etc/ssh/sshd_config file and restarts the SSH service. The password will be set using the chpasswd command. The user_data argument in the aws_instance resource lets us run custom commands on instance startup. This is commonly used to:
Create a new user account
Set up SSH access
Install packages or tools
Modify firewall or system configurations
Instead of hard-coding the SSH password in the Terraform configuration, we will store it in encrypted state in AWS SSM and retrieve it later (to recall how to store and retrieve secrets from AWS SSM, refer to this post).
Terraform resources required to deploy EC2 instance
aws_instance
Terraform provides the aws_instance resource for creating a new EC2 virtual machine with specific attributes.
Here’s the syntax for provisioning aws_instance resource:
resource "aws_instance" "kali" {
  ami                         = var.ami_id
  instance_type               = var.instance_type
  subnet_id                   = var.subnet_id
  vpc_security_group_ids      = [var.security_group_id]
  associate_public_ip_address = true

  tags = {
    Name = var.instance_name
    Environment = var.environment
  }
}
aws_security_group
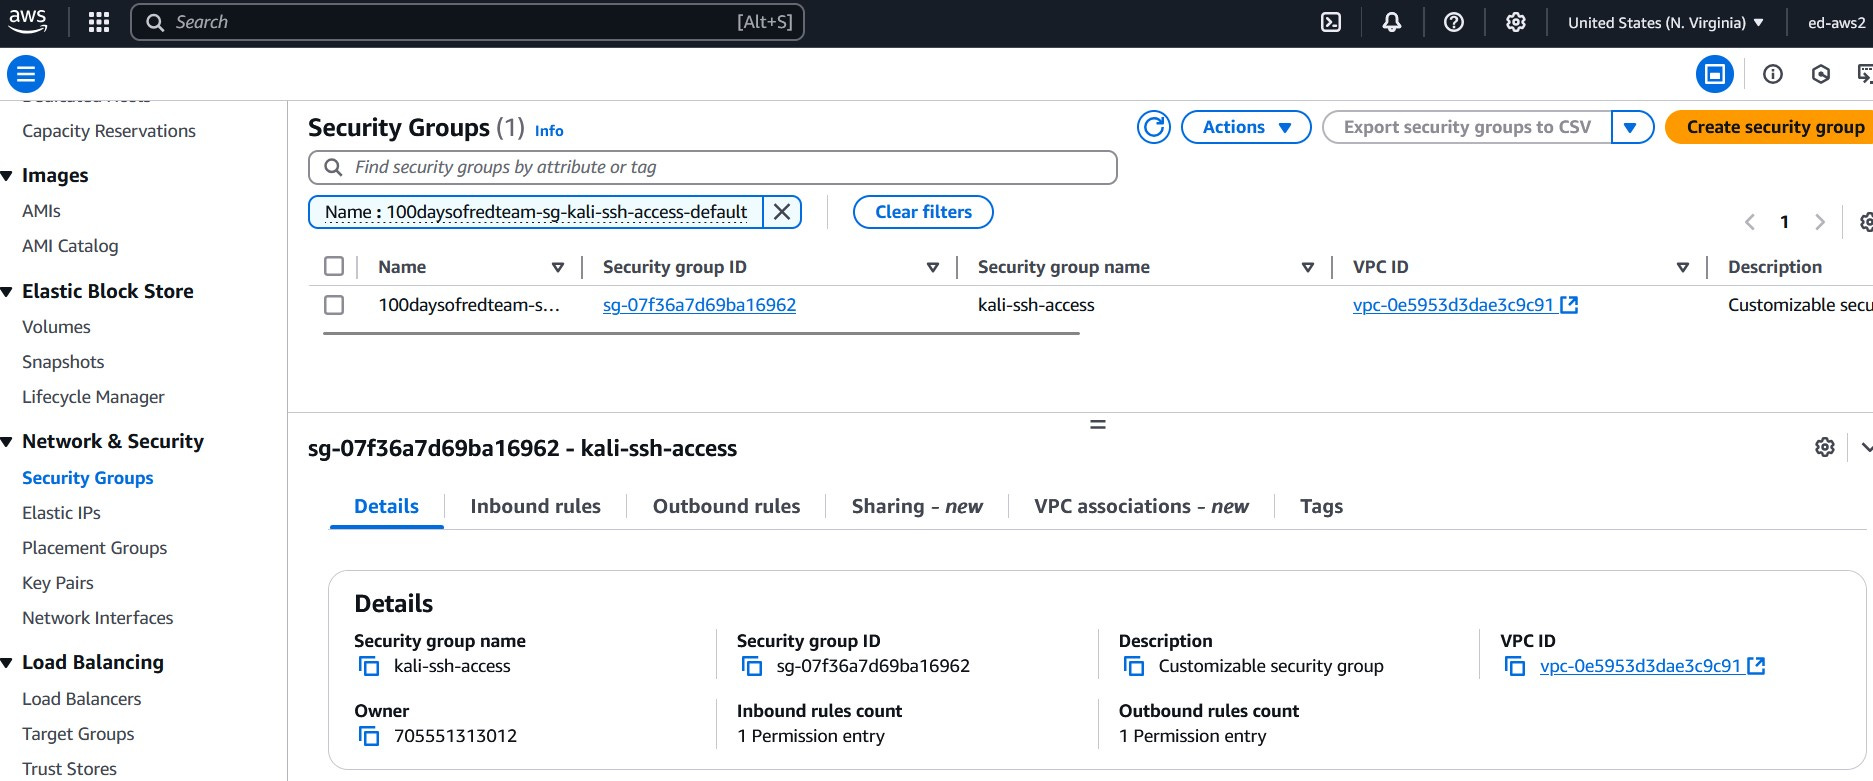
Terraform provides the aws_security_group resource for creating virtual firewalls for instances. The aws_security_group resource specifies both inbound (ingress) and outbound (egress) rules.
Here’s the syntax for provisioning aws_security_group resource:
resource "aws_security_group" "kali_ssh" {
name = "kali-ssh"
description = "Allow SSH from my IP"
vpc_id = var.vpc_id
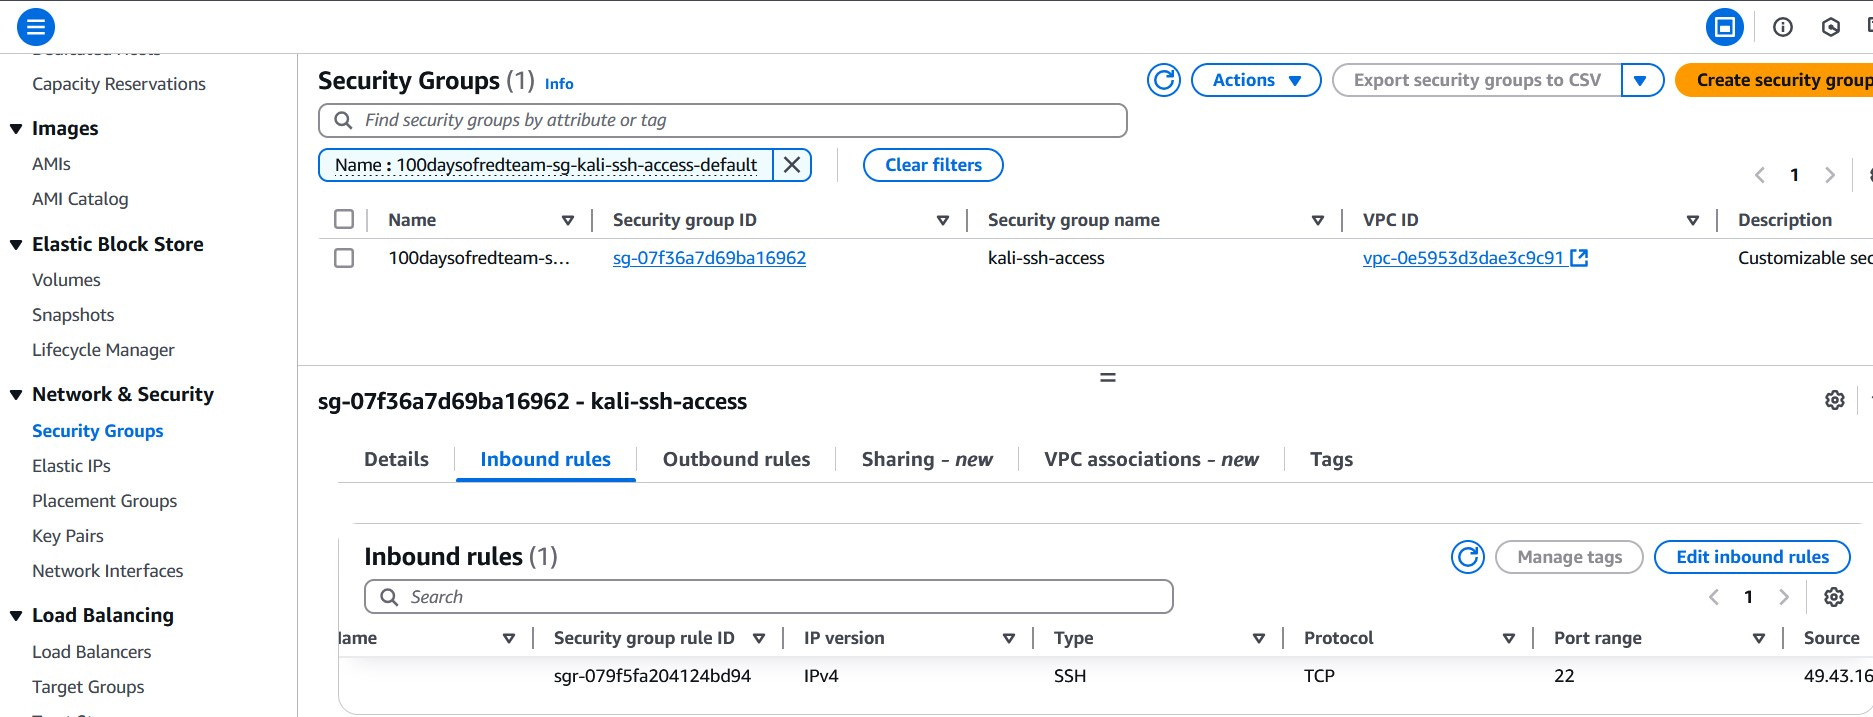
ingress {
description = "SSH from your IP"
from_port = 22
to_port = 22
protocol = "tcp"
cidr_blocks = [var.allowed_ip]
}
egress {
description = "Allow all outbound traffic"
from_port = 0
to_port = 0
protocol = "-1"
cidr_blocks = ["0.0.0.0/0"]
}
tags = {
Name = "100daysofredteam-sg-${var.environment}"
}
}Deploying the EC2 instance
Refer to the Kickstarting red team infrastructure automation via Terraform to understand the architecture we are working with.
We will use the following updated directory structure (note that we have added two new modules, ec2_instance and security_group):
red-team-infra/
├── main.tf
├── variables.tf
├── outputs.tf
├── terraform.tfvars
├── providers.tf
├── secrets.tfvars  # <--- manually created, not committed
└── modules/
    ├── vpc/
    │   ├── main.tf
    │   ├── variables.tf
    │   └── outputs.tf
    ├── subnet/
    │   ├── main.tf
    │   ├── variables.tf
    │   └── outputs.tf
    ├── internet_gateway/
    │   ├── main.tf
    │   ├── variables.tf
    │   └── outputs.tf
    ├── route_tables/
    │   ├── main.tf
    │   ├── variables.tf
    │   └── outputs.tf
    ├── ec2_instance/
    │   ├── main.tf
    │   ├── variables.tf
    │   └── outputs.tf
    └── security_group/
        ├── main.tf
        ├── variables.tf
└── outputs.tfReminder: You must create a
secrets.tfvarsfile manually to hold credentials. Never commit secrets to version control. It contains AWS credentials temporarily stored in plain text, which is not recommended for production environments. Also, we are still using local state files for simplicity. In a real red team deployment, you must use an encrypted remote backend.
Clone this project to your machine and execute the following commands to deploy the infrastructure:
⚠️Reminder: Switch to the dev Terraform workspace (terraform workspace select dev) before executing following commands. To create dev workspace use, terraform workspace new dev.
terraform init
terraform plan -var-file "secrets.tfvars"
terraform apply -var-file "secrets.tfvars"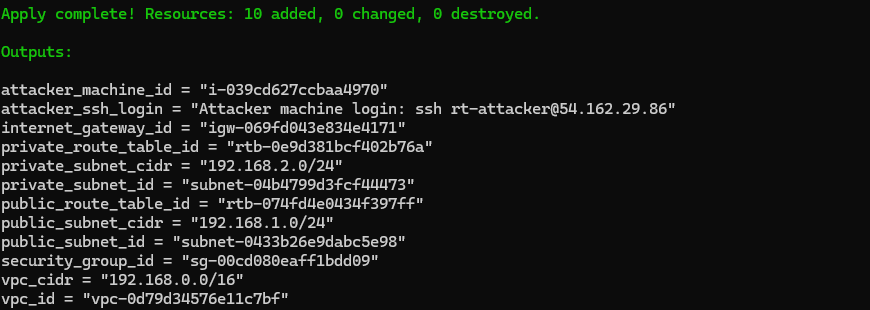
Once done, remember to destroy the infrastructure via following command (or you may incur significant costs):
terraform destroy -var-file "secrets.tfvars"
TL;DR
In this post we covered how to:
- Deploy a Kali Linux EC2 instance using the official Kali Linux AMI.
- Configure it for password-based SSH access (not recommended for production setups) via user_data argument of aws_instance resource.
- Restrict access to it using a security group.
Follow my journey of 100 Days of Red Team on WhatsApp, Telegram or Discord.